Things are continuing to progress nicely with the saw mill restoration. With a combination of penetrating oil, brute strength, and some judiciously applied heat, we’ve managed to get all the rusted parts moving again.
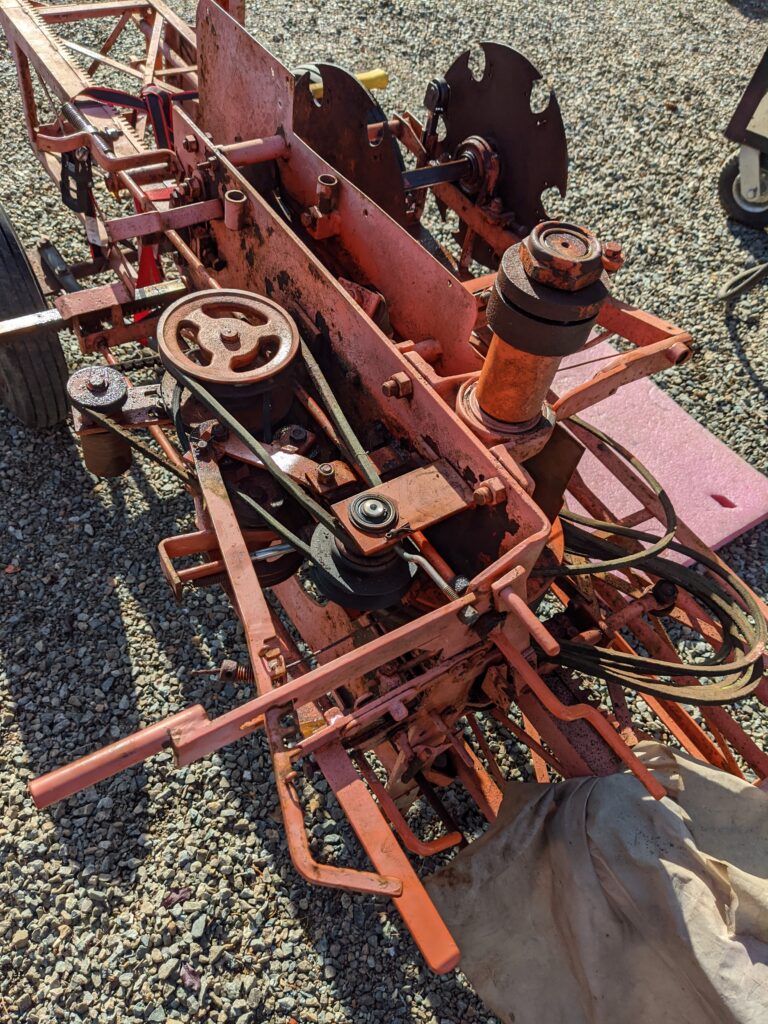
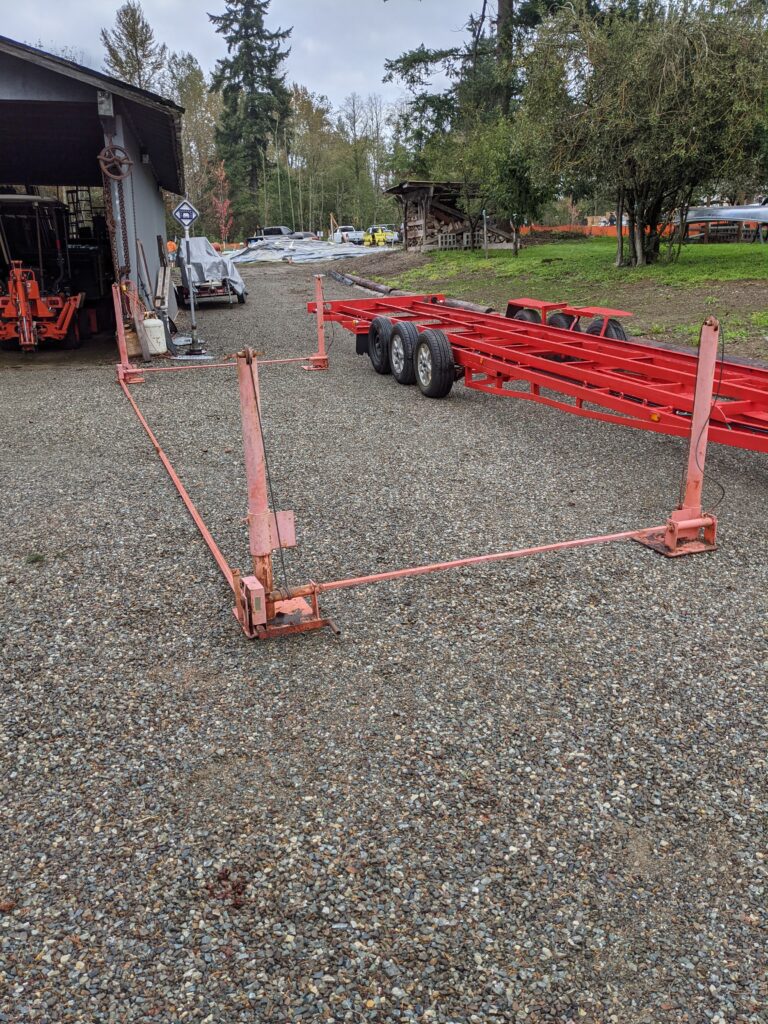
The carriage assembly had many parts that needed to be unstuck. The engine attaches to this carriage, with the belts transferring power from the engine to the saw blades and the carriage movement mechanisms.
Next we needed to free up the sleeves on the end stands. After several applications of penetrating oil and a large pipe wrench, we ended up applying heat to expand the metal and help loosen things up.
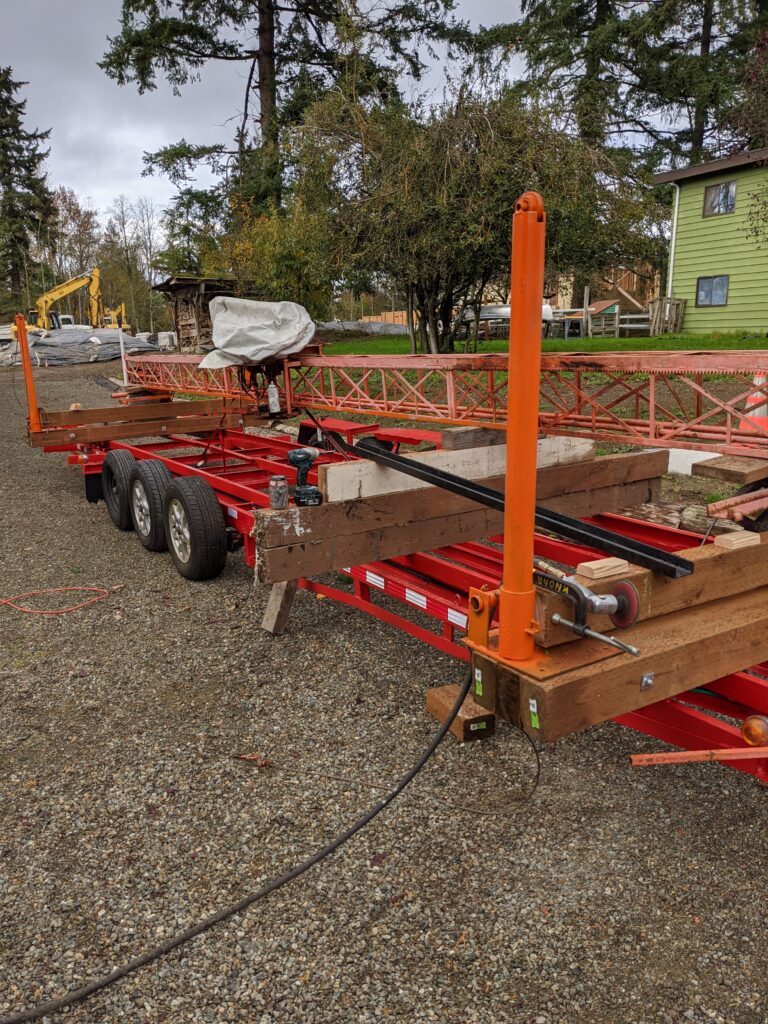
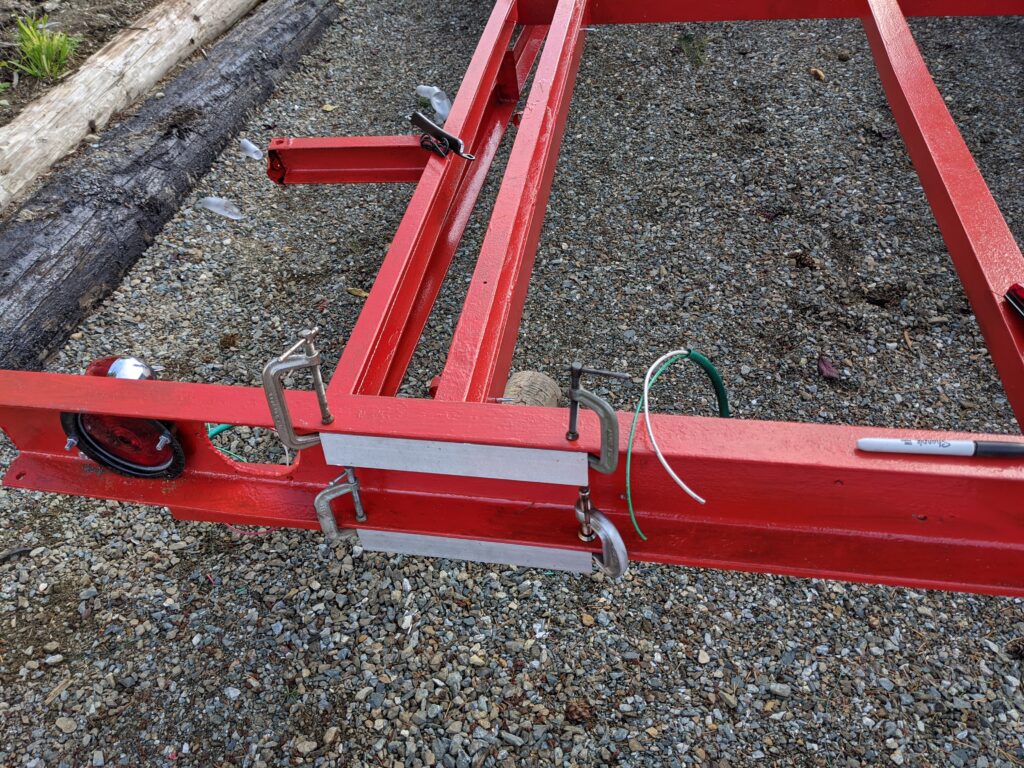
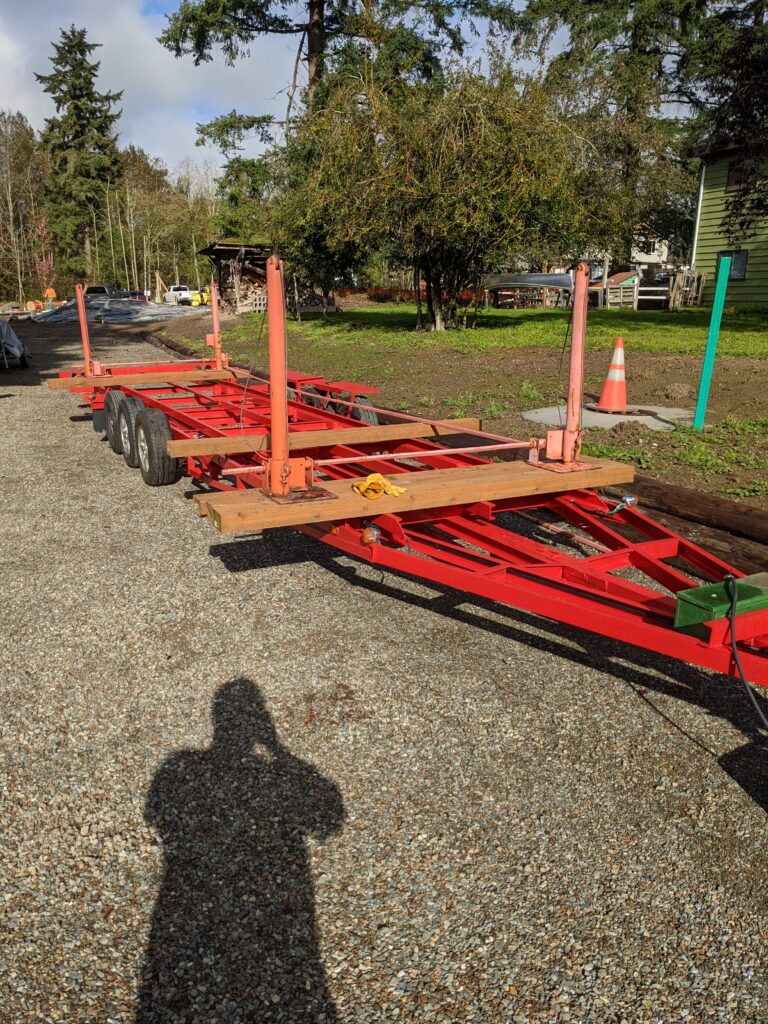
Once the end stands were freed up, we started assembling the stands and the rail on the trailer.
There are two cross-beams on either end of the trailer that connect the end stands. Metal rack-and-pinions are attached to the cross beams, and the rail travels along the rack-and-pinions to adjust the saw’s position across end of the log.
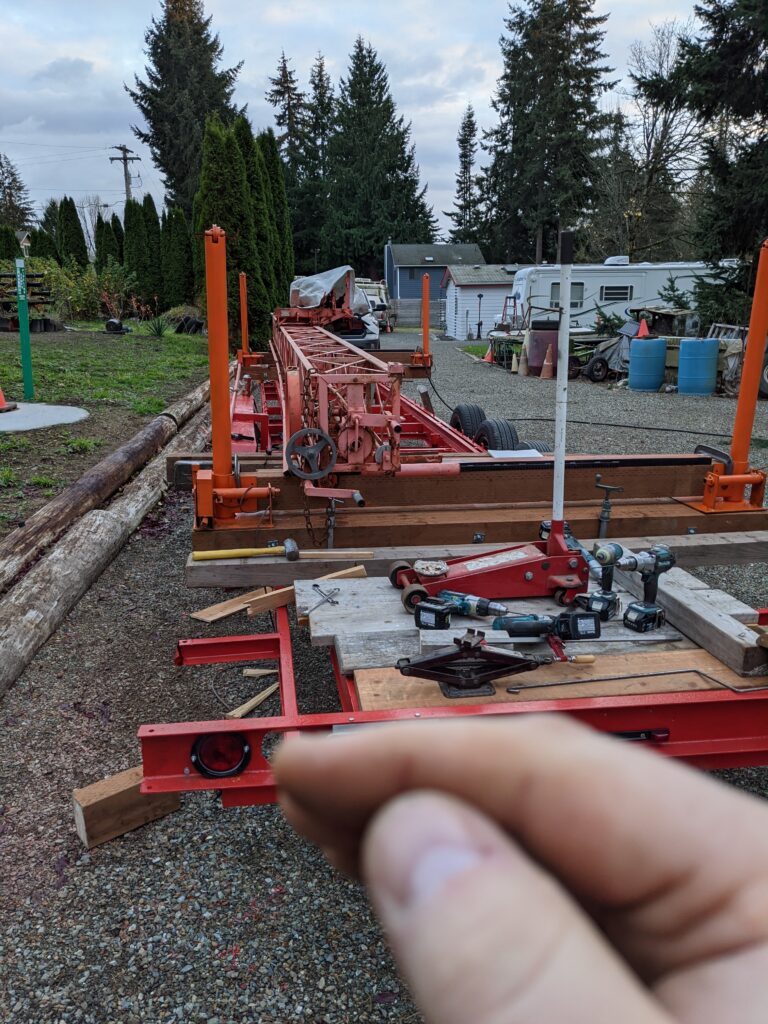
There’s still a lot more work needed to get the mill squared, and to get the engine onto the carriage, but it’s encouraging to see things starting to come together.
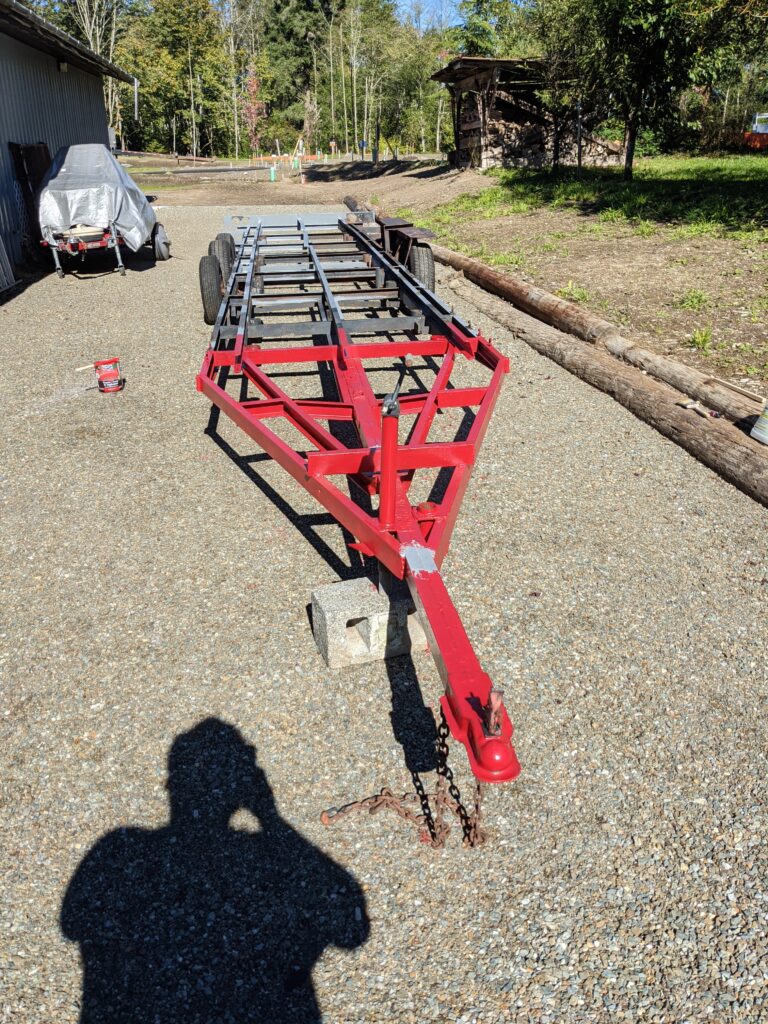
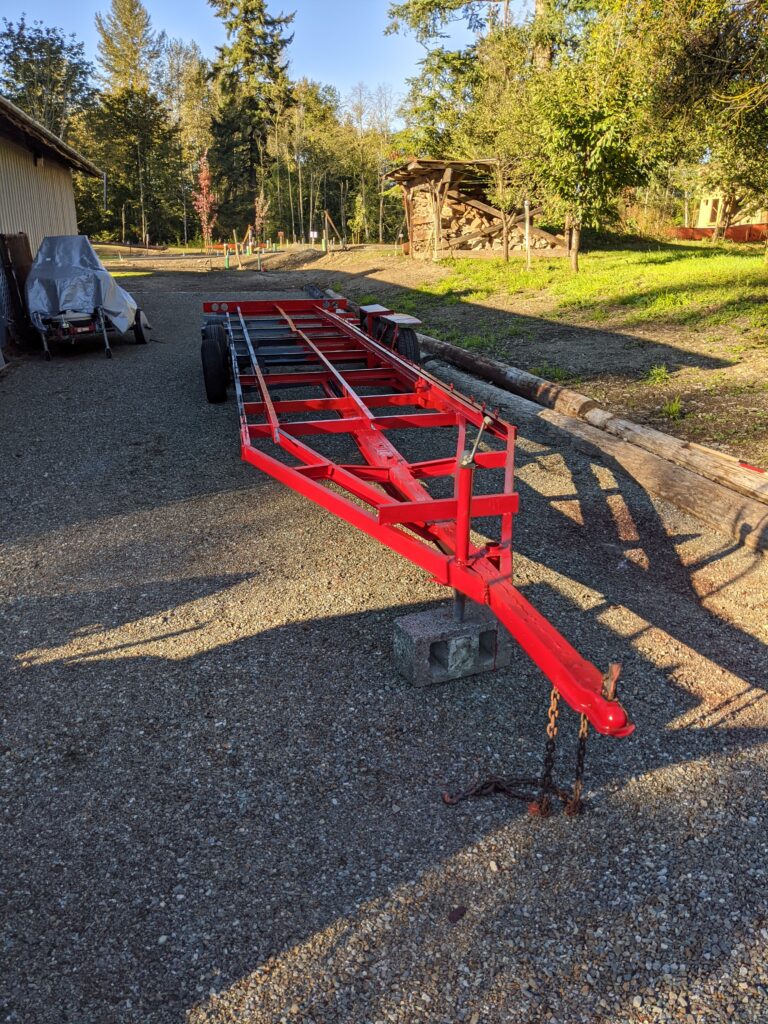
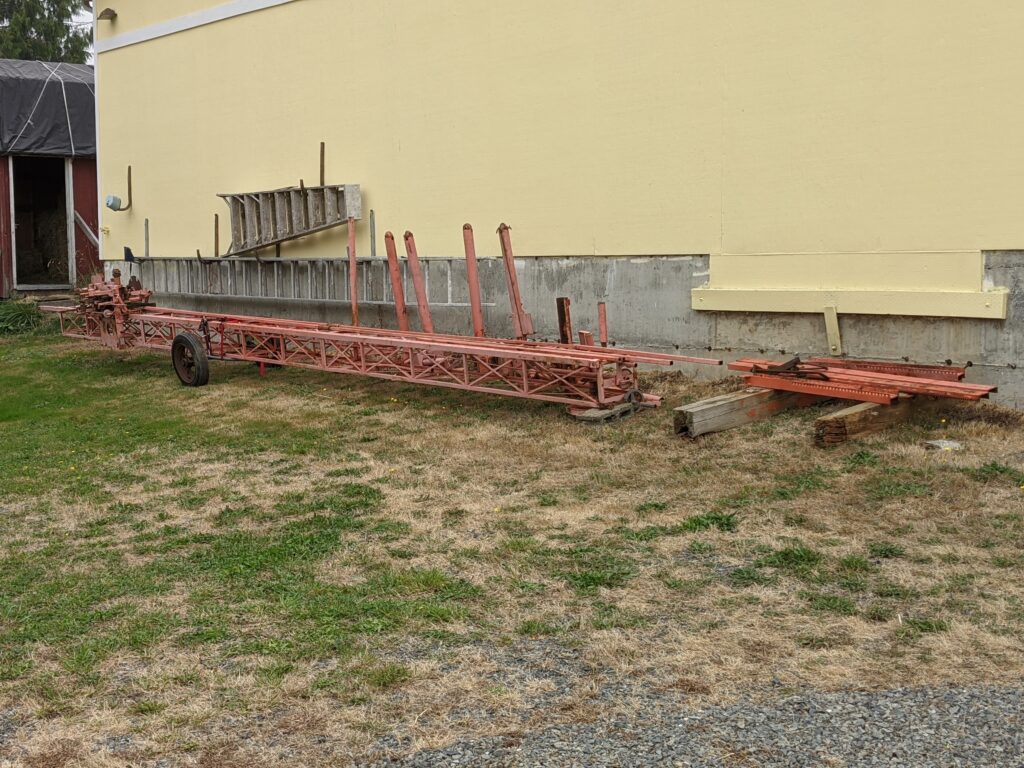
The first step was to get the trailer cleaned up and painted. You can see that starting above. I put primer on the particularly rusty parts to try to help the paint adhere better.
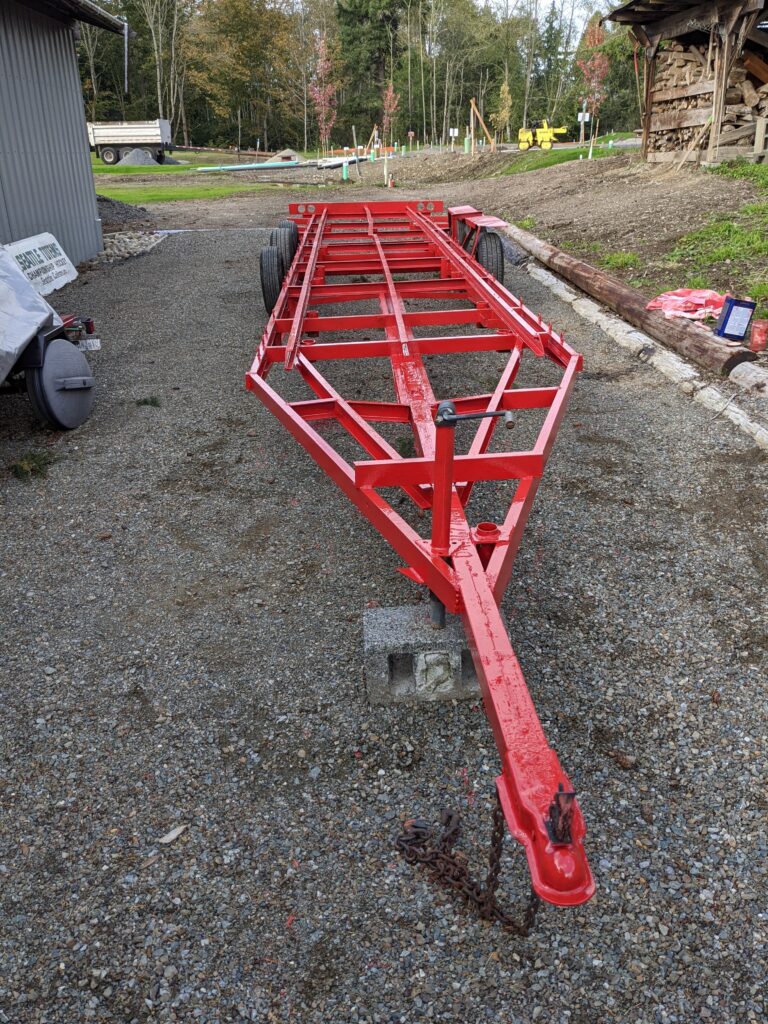
Progress continued over several weeks as weather and time permitted. The final result isn’t going to win any beauty contests, but it should keep the trailer from rusting out underneath me.
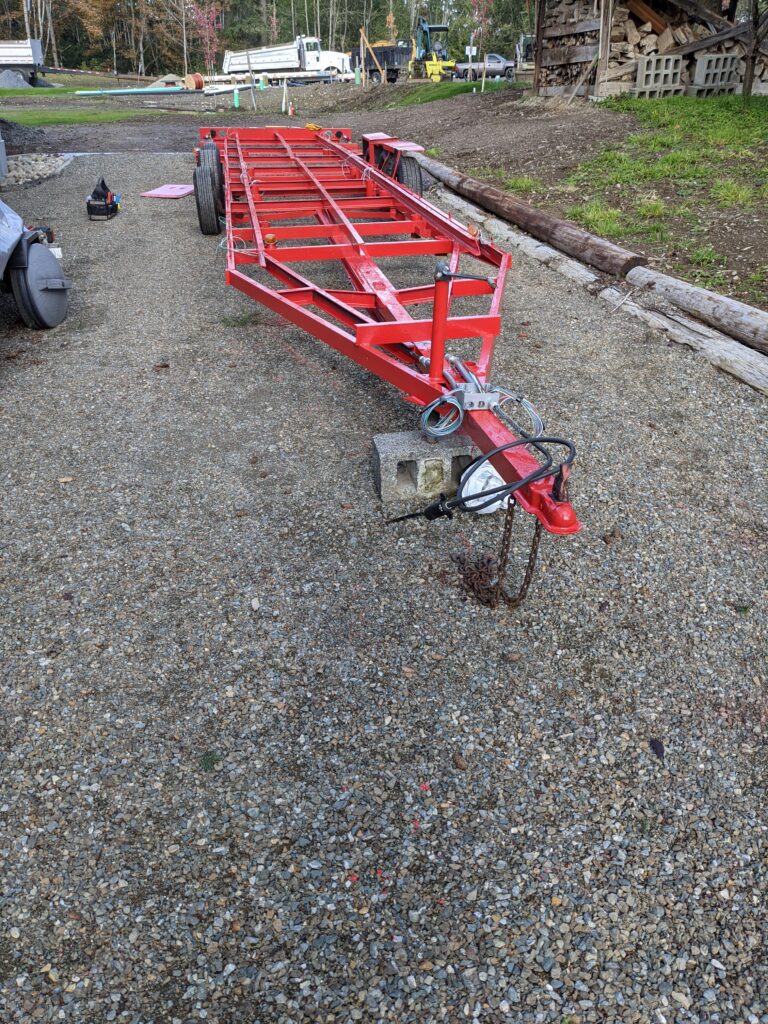
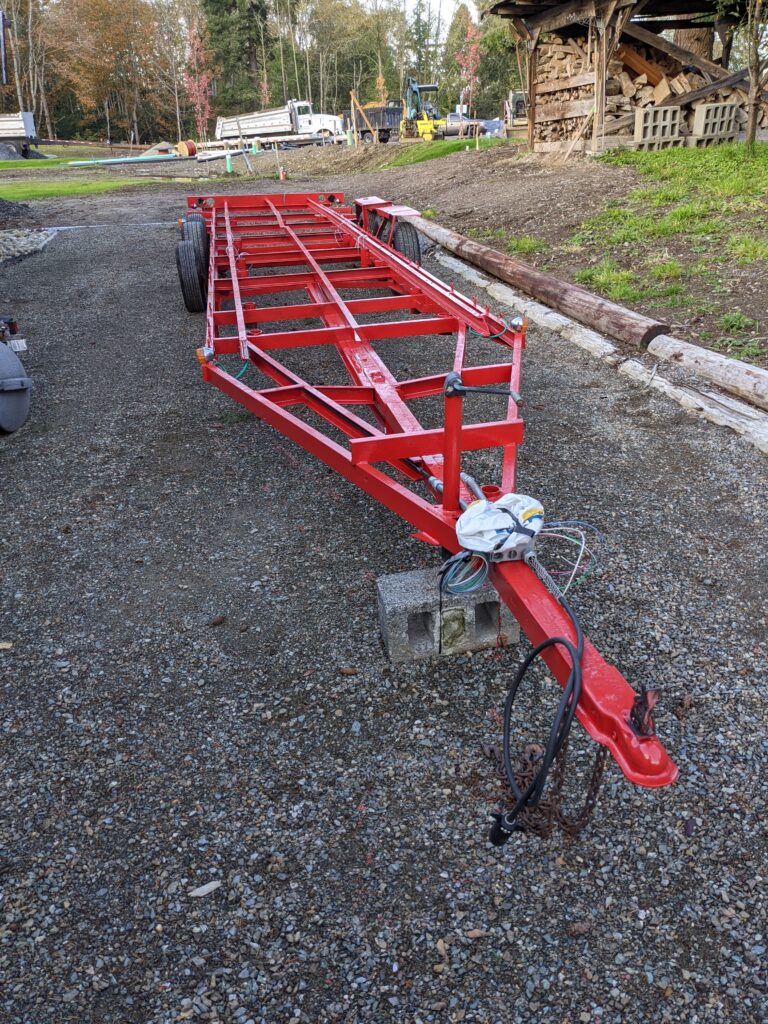
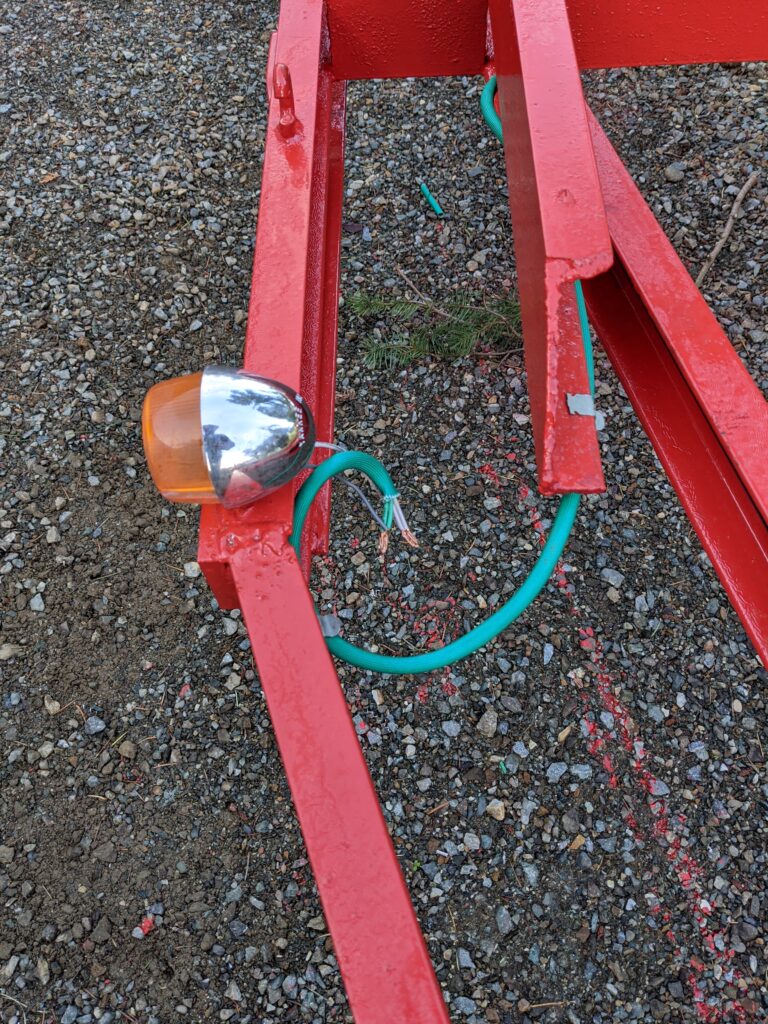
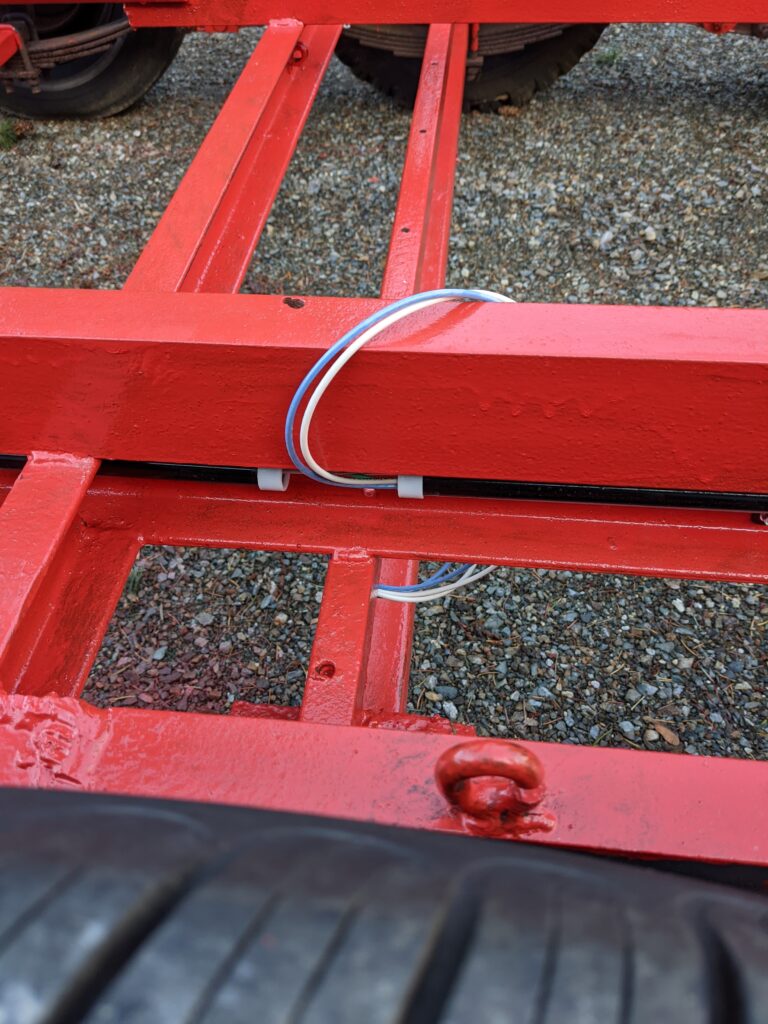
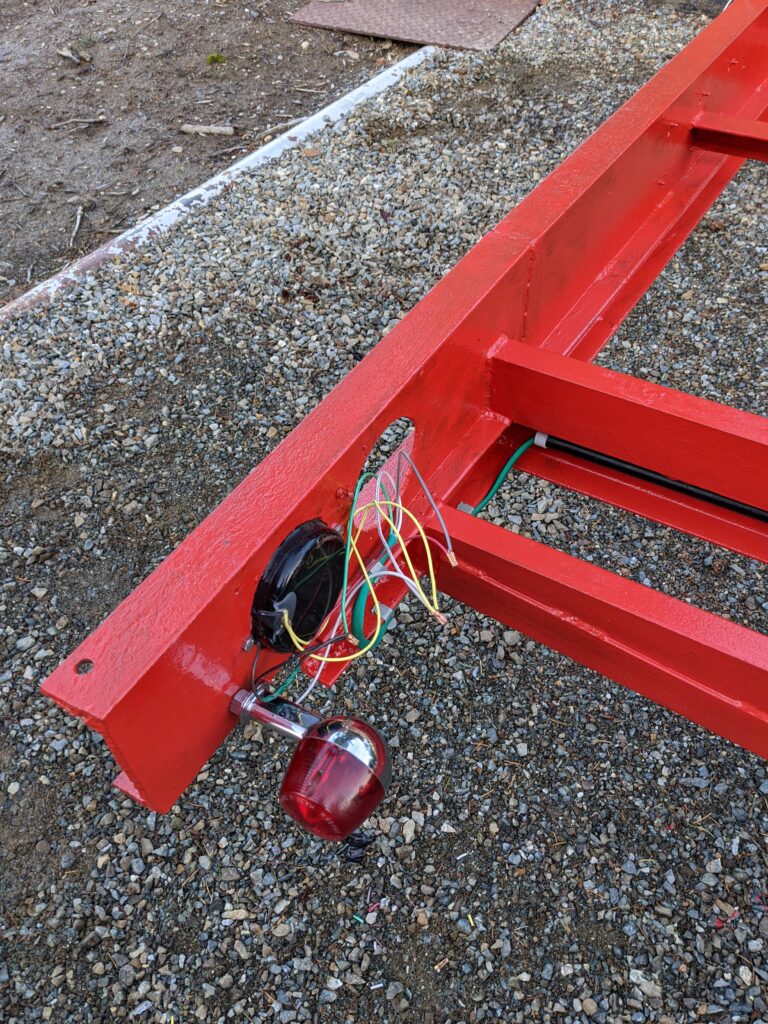
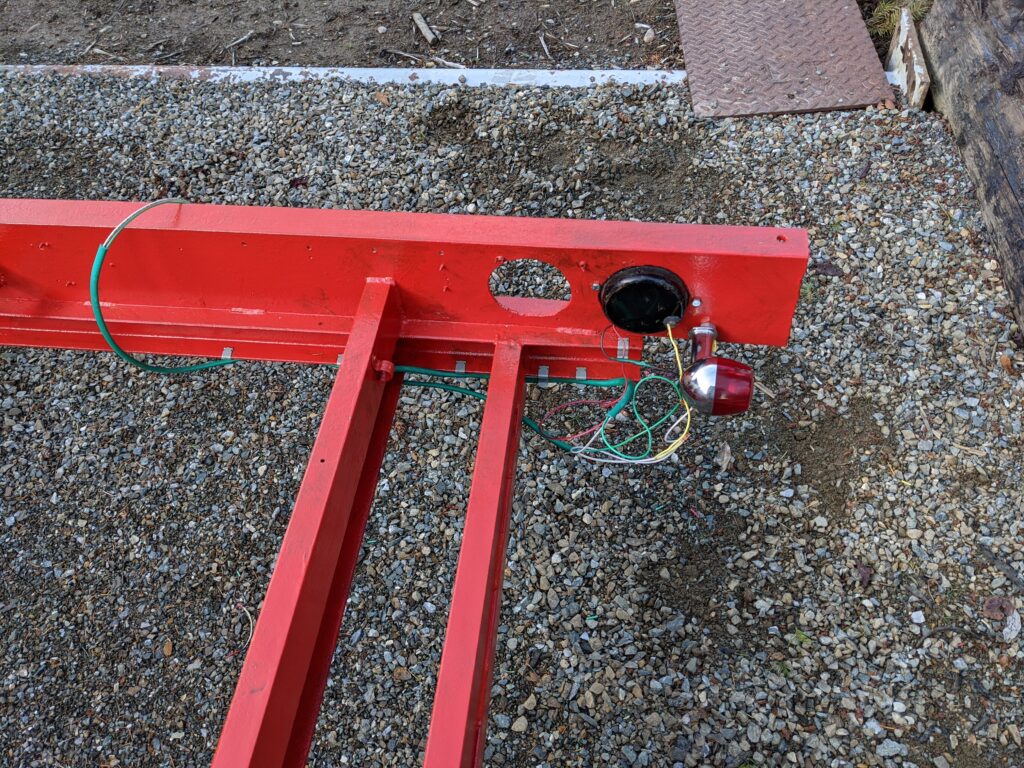
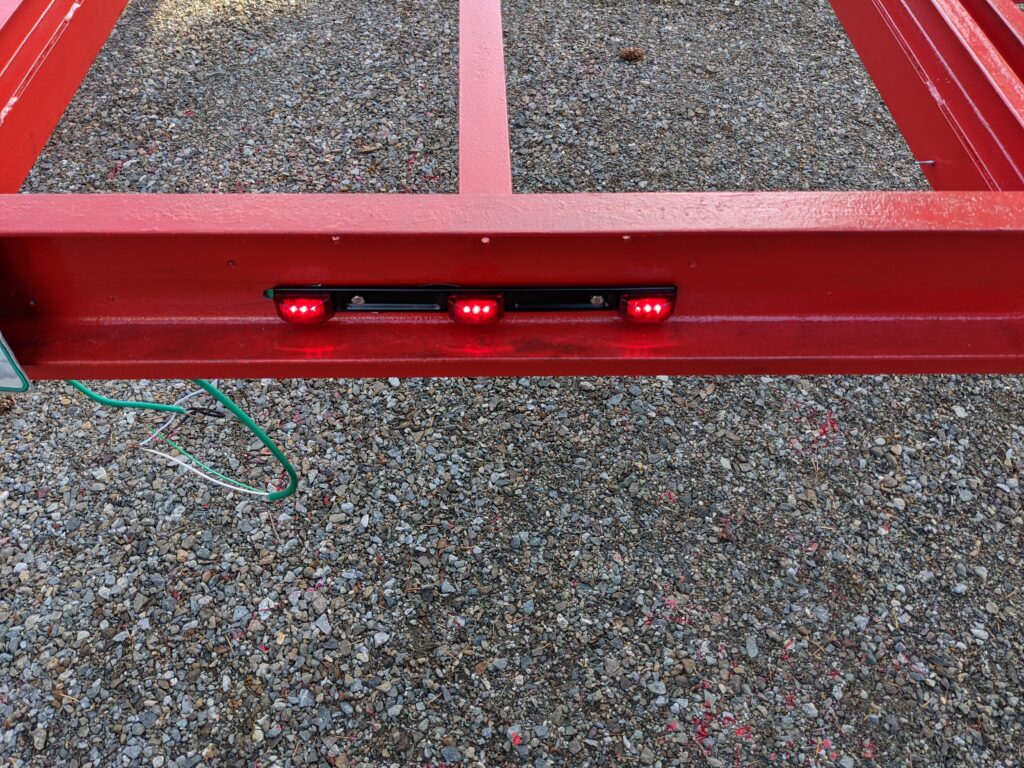
Next up was wiring. My uncle, a retired electrician, was a very helpful resource. He mapped out the wiring diagram and ran conduit and wires down the center of the trailer. All I had to do was attach the various lights to the frame and wire them up.
Progress pic from installing a base for the license plate. Apparently I still need to capture a picture of the final result.
We grabbed a car battery and tested the wiring. Amazingly, everything seemed to work. Considering that we’d used random lights off other trailers (and a motorcycle), this was kind of surprising.
After we finished testing the wiring, we taped and zip tied everything up (which I apparently forgot to take any pictures of). Several of the old tires wouldn’t hold air, so we swapped in some new wheels that my uncle had laying around.
With the trailer work completed (minus some reflective tape), I started assembling the saw mill again, to help position the 4×6 beams that will support everything.
After getting an idea of how the mill will be laid out on the trailer, we started working at loosening up all the moving parts. Again, I forgot to take any more pictures at this stage, so I’ll have to capture more next time I’m out at the barn.
Most of the parts have been sitting out in the weather for about 30 years, but amazingly most of them started moving quite easily with some generous application of “Knock’er Loose” penetrating oil. There are a few pieces that will need a few more applications of oil, and perhaps some forceful persuasion, but it’s exciting to see the saw mill starting to come back together again.
A couple weeks ago, my wife told me about an old saw mill that had been sitting on her family’s property since she was a kid. Her uncle Tom had brought it up, offering to help me restore and use it for milling lumber.
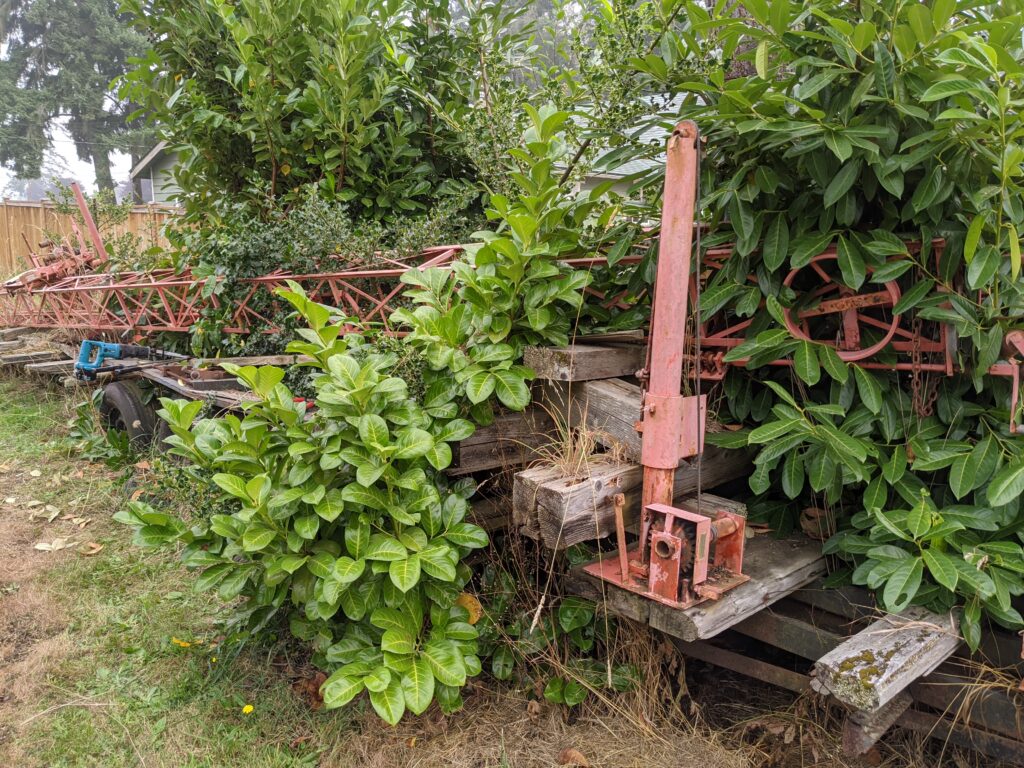
I had no idea what kind of mill it was, but I was excited to check it out and fix it up. The only issue was that “there are a few trees growing through it”.
As it turns out, there are more than a few trees growing through the mill 😅
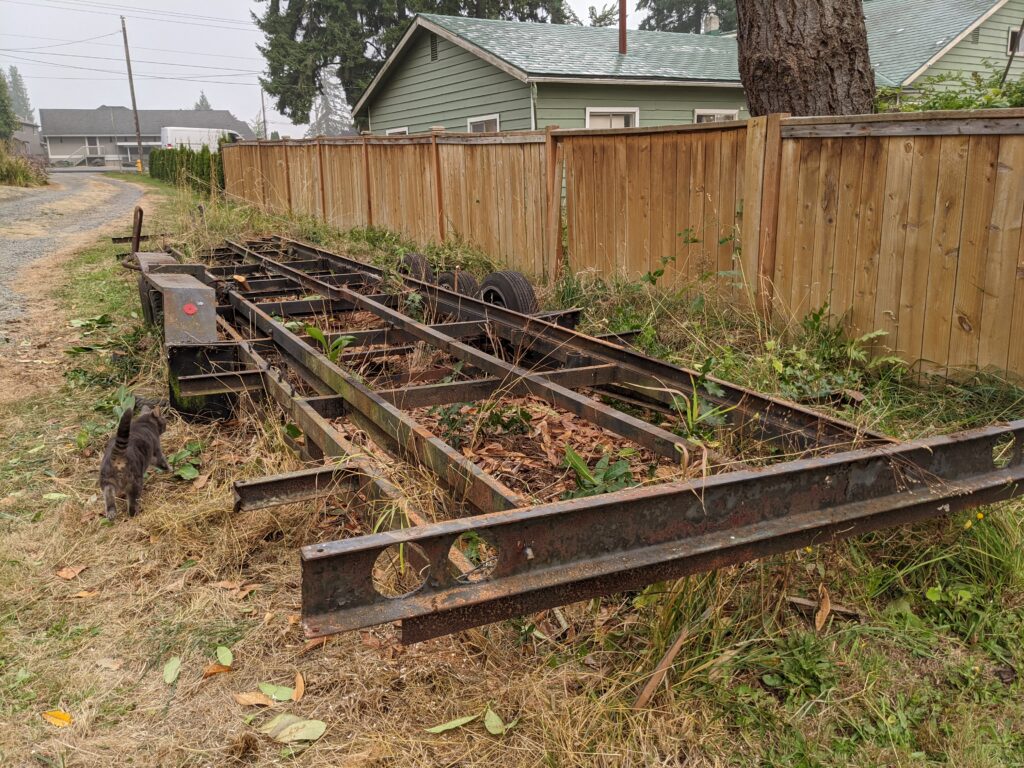
When I showed up to work on the mill, it looked pretty daunting. The picture above actually shows the state after a small trailer full of brush had already been cleared away.
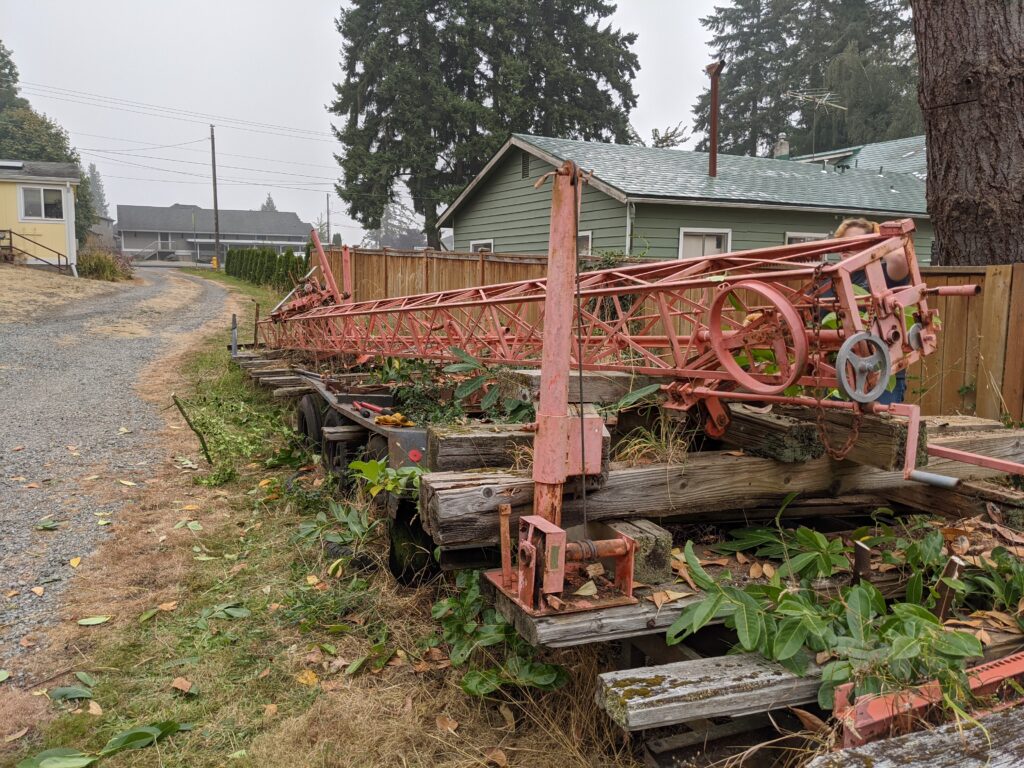
However, after only a half hour of work, we had mostly cleared away the brush and could see the state of the mill. Things went quickly with four people helping cut and clear away the brush.
With the brush cleared away, you can see the frame of the mill, as well as the (rotted) timbers on the trailer that supports the mill.
This mill was purchased by the family in 1972. It’s a Mobile Dimension Model 127 saw mill, made by Mobile Manufacturing. If you’re curious about this type of mill, you can learn more from this promotional video.
This mill was actually purchased in 1970 by someone in Montana, then sold to my wife’s grandfather a couple years later. After being used to cut lumber for several construction projects on the property, it has sat unused for the last 30+ years. The trailer and frame have been out in the weather all that time, but fortunately the engine and saw head have been stored out of the elements, so we’re optimistic about our ability to get it all working again.
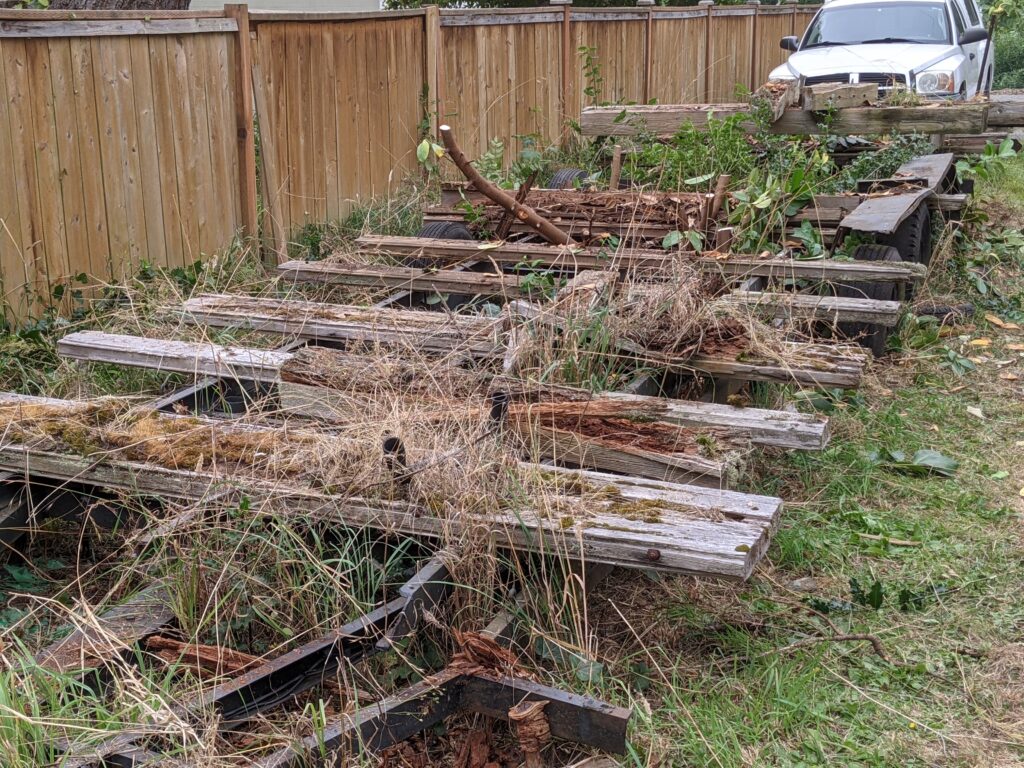
Our next step was to finish removing the mill so that we could clean up and rebuild the trailer.
With the mill removed, the next task was to clear off the rotten deck boards from the trailer and clear away the remaining brush. This actually took us another hour of work. The boards were bolted around the frame of the trailer, and the hardware had rusted together, so we ended up using a chainsaw to cut up the boards. After cutting away most of the wood, we were able to split the remaining chunks that were still attached by the rusted hardware, clearing them away from the trailer.
The decking has an interesting story of its own. It comes from an office building that my wife’s grandfather owned. When the city condemned the building for a new development, he salvaged some cedar timbers from the building and repurposed them for this trailer. Cedar’s resilience and rot resistance was evident as we pulled the boards off of the trailer. While some of them were rotten through and through, many were still surprisingly solid at their centers. Still, with the weight that the decking needs to support, we will be starting fresh with new 4×6 pressure treated lumber.
Over the weekend, uncle Tom got the trailer down to his shop and worked on the tires. Amazingly, 4 out of the 6 tires were still able to be inflated, despite sitting in the dirt for 30 years.
Last week we worked on stripping out the old wiring and sketching up a new wiring diagram. Tom is a retired electrician, which has been incredibly helpful because I’m a novice when it comes to wiring. Before we installed new wiring, we wanted to clean up and paint the frame, so that was our plan for this week. Unfortunately it has rained most of this week, so all I’ve been able to do is put primer on the areas where the old paint has rusted or chipped away. I’ll post more pictures when the rain stops and we’re able to make more progress.
When I’m planning more complex projects, I often find that pencil and paper has limitations for sketching out designs. I’ve tried to pick up SketchUp a few times over the last year or two, but I always got frustrated and gave up before I finished modeling my build.
This week I decided to sit down and get myself over that initial learning curve so that I can be productive in SketchUp. Thanks to a recommendation from a Facebook group, I found this incredibly helpful video from Steve Ramsey which introduces SketchUp specifically for woodworkers.
In all, it only took me a couple hours to get basic proficiency. I just followed the above video, pausing occasionally to play with new tools or figure out why my model wasn’t matching the video. The number of things you need to learn before you can do most basic modeling in Sketchup is actually relatively small. It’s just not very intuitive if you’re trying to figure it out yourself without any guide to help you figure out how to approach your model.
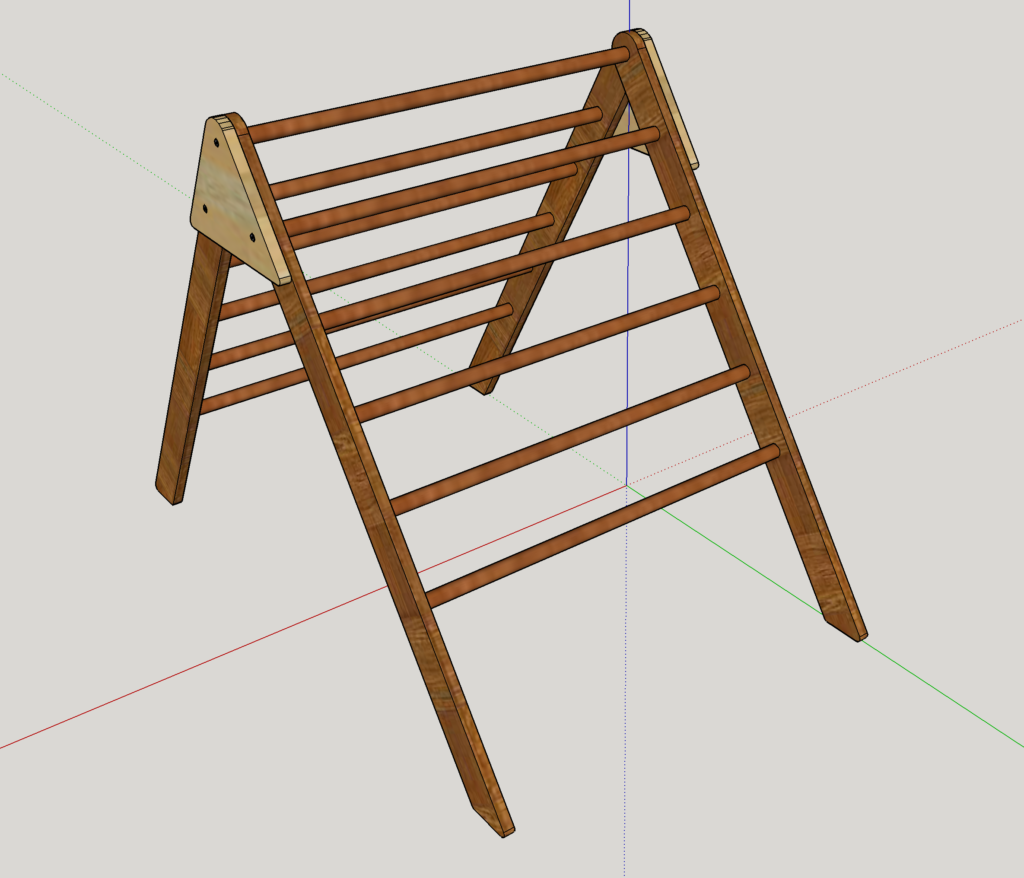
After finishing the video, I decided to spin up a new sketch and model the Pikler triangle that I built last month. I learned even more by modeling without step-by-step instructions. The main new things I learned were how to use the Protractor tool to measure angles and set angled guides, how to accurately draw circles and use them to round over pieces, and how to reorient the axes for a component. Here’s the model I ended up with. There’s still room for some small tweaks here and there, but overall I’m pretty happy with how it turned out.
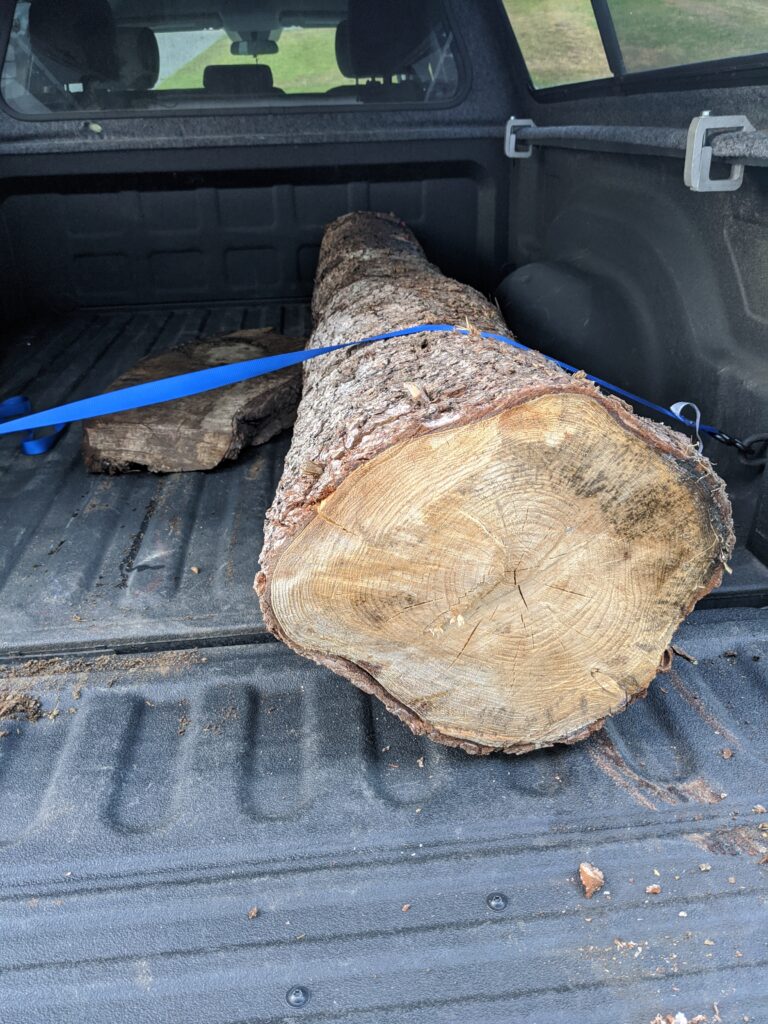
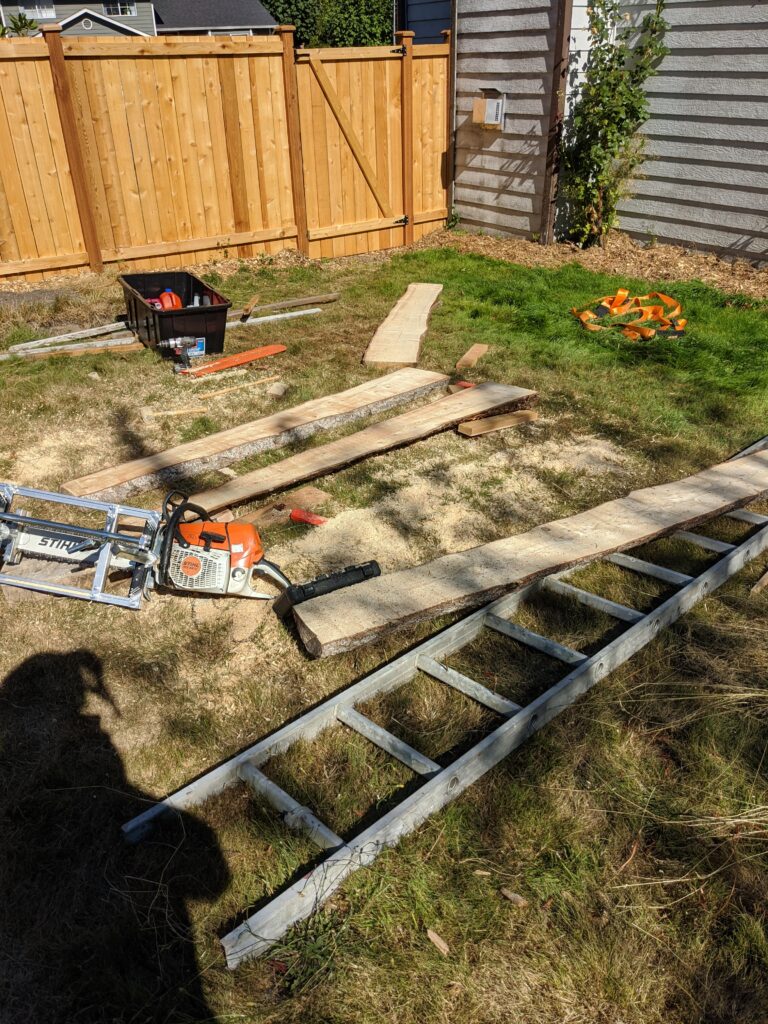
I recently purchased a Stihl MS 661 chainsaw and a Granberg 36″ Alaskan Chainsaw Mill. After finally receiving chains meant for ripping (this took a month and a half due to COVID delays), I got out in the yard this weekend to slab up a pine log I picked up from a neighbor.
The process I used for milling isn’t really unique. There are hundreds of videos on Youtube that show the same technique, but I thought it would be fun to write up my own experience.
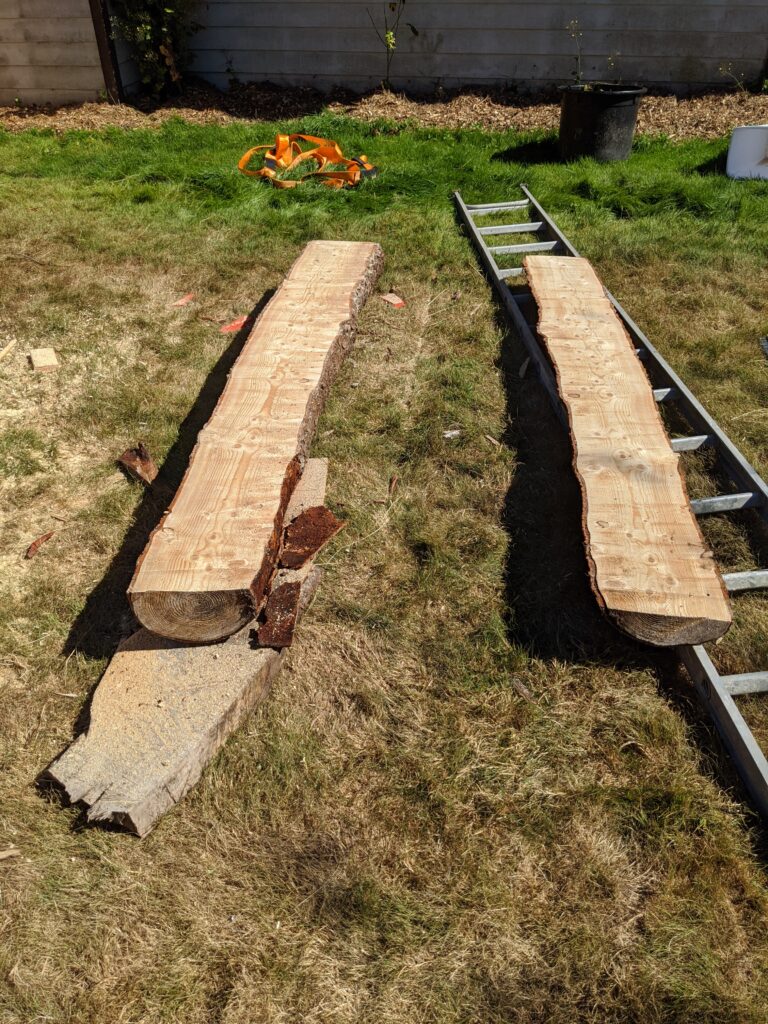
I used an old aluminum extension ladder to guide the first cut. Putting screws through the rungs and into the log secured the ladder, giving me a flat level surface for my first cut.
After finishing the first cut, I made the rest of the cuts using the flat top of the last cut to register the saw mill.
I got 2 slabs from the log, each 2 1/2″ thick. After that, I decided to get one more cut from the top of the log. I had set for a very thick cut to avoid hitting the screws with my saw, so I was able to get an additional 1 1/2″ slab from that top.
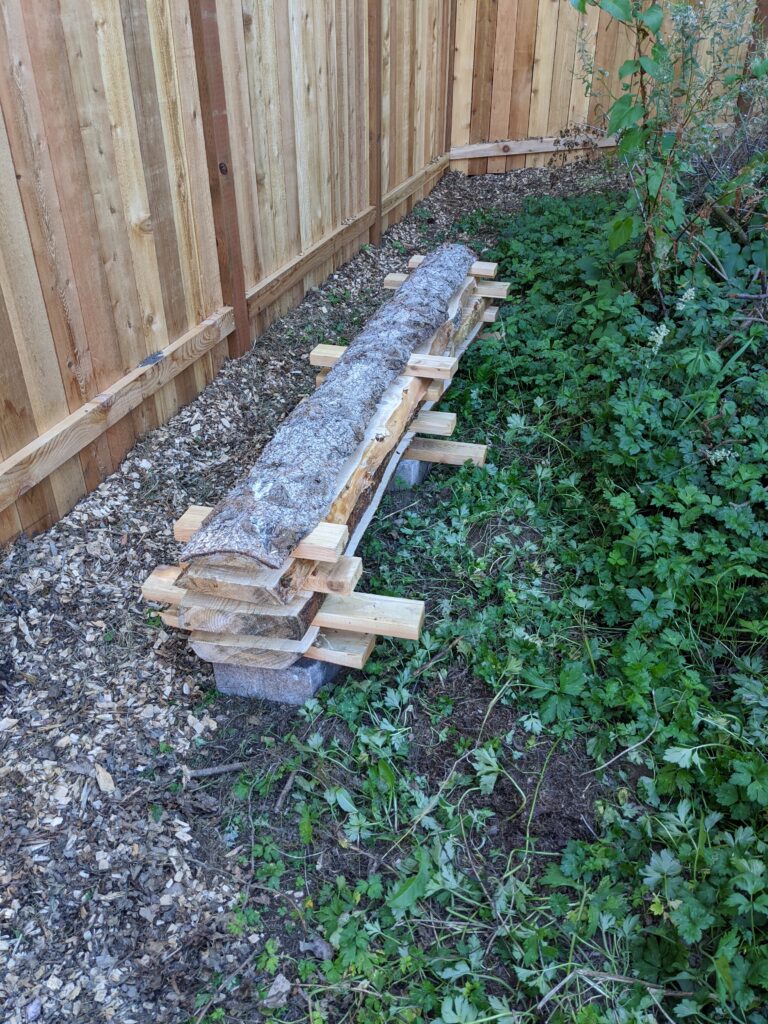
I stacked the slabs in a shady part of my yard. I had some short pieces of cedar (left-overs from our new fence) which I used as stickers, but I will eventually rip some smaller stickers and re-stack the logs.
I learned this technique for air drying lumber from Matt Cremona’s Youtube channel. Hopefully it works here in the Pacific Northwest. I guess I’ll find out in a year or so.
Slabbing the log only took a couple hours (include some novice mill setup). It was a bit exhausting, especially in 90º weather, but it was very satisfying to see the slabs coming off the log. I’m looking forward to cutting up more logs in the future!
Other Equipment
Here is some other equipment I used for milling.
Husqvarna Forest Helmet – Since I’m just milling on the ground, I don’t think the hard hat is important, but the integrated face screen and hearing protection make this a convenient choice.
Chainsaw Work Gloves – I picked these out on Amazon. They’re comfortable and flexible. I can’t speak to their effectiveness at stopping a saw (and hopefully never will), but they do a good job of protecting my hands from the heat of the saw head while milling.
Timber Savage 5.5″ Felling Wedges – I use these to keep the log from pinching the saw. I’ve also used them to help wedge under the log and keep it stable while milling. Any rubber mallet is also handy for knocking the wedges into place.
Forester Chainsaw Safety Chaps – Again, I hopefully won’t ever have to experience the safety effectiveness of these, but they’re a good safety precaution.
3M Reusable Respirator and filter – From what I’ve read online, these aren’t necessary, and I’m not even sure if they’re effective at eliminating fumes from the chainsaw. That said, they do reduce the strong exhaust smell while I’m cutting.
For a recent project, I needed to figure out a way to drill holes in the center of some wooden dowels. Because the dowels needed to be 20-30 inches in length, I wouldn’t be able to directly use my drill press to drill the holes. I initially figured I could get away with finding the center of the dowel and then eyeballing the angle to drill straight into the dowel. After spending far too much time trying to get this to work, I decided that eyeballing wouldn’t be accurate enough.
After some thought, I came up with a jig that would allow me to accurately drill a hole straight into the center of the dowel.
First, I glued two pieces of scrap 2×4 together to make a block approximately 3″ by 3.5″. The exact dimensions aren’t super important, but creating a thicker block helps with accuracy.
Next, make sure your drill press table is at a precise 90° angle to the chuck. If it’s not accurate your jig won’t be accurate, and then your dowel holes won’t be accurate.
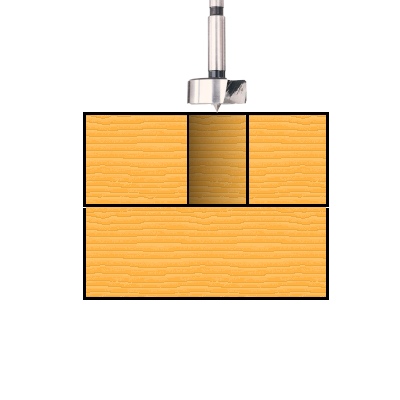
Using a Forstner bit with the same diameter as your dowels, drill about halfway through your laminated block. It isn’t critical to drill exactly halfway through, but make sure you drill far enough that the dowel will be securely held perpendicular when it is placed into the hole.
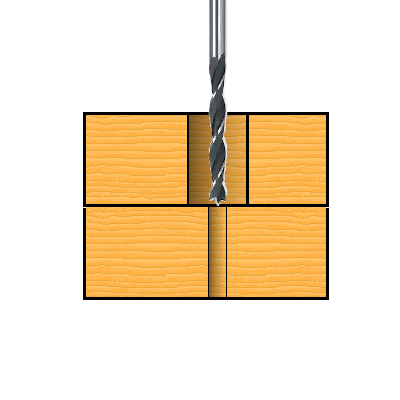
Now swap out for the drill bit that you want to use for drilling into the dowel. Align the bit with the center divot that the Forstner bit left in the hole. Drill the rest of the way through the block.
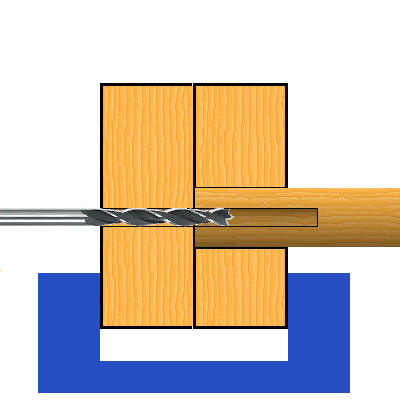
Now you have two holes that should be centered and parallel with each other. The larger hole will hold your dowel in place while you drill. The smaller hole will guide your drill bit to ensure that it’s centered and parallel to the dowel.
To drill your dowel, secure your jig vertically in a vise, or with clamps. Insert your dowel into the larger hole. It might be a tight fit if your Forstner bit is the exact size of the dowel. If you have trouble getting it to fit, you can use sandpaper to slightly narrow the width of the dowel. Keep in mind that you’ll also need to get the dowel back out of the hole, so don’t force it into the hole if it’s too tight.
Once you’ve loaded up the dowel, you can drill through the guide hole on the other side of the jig. If you need a specific hole depth, put a piece of tape on your drill bit to tell you when you’ve reached the desired depth.
And there you go. Some scrap wood and 20 minutes of time will give you a jig that can drill accurate and repeatable holes.
I’ve been enjoying my woodworking hobby and want a place to write about it. No particular aspirations or goals. I mostly want a place to track my projects, and a way to see my own improvements over time.