Categories
Milling

Chainsaw Mill Test Run

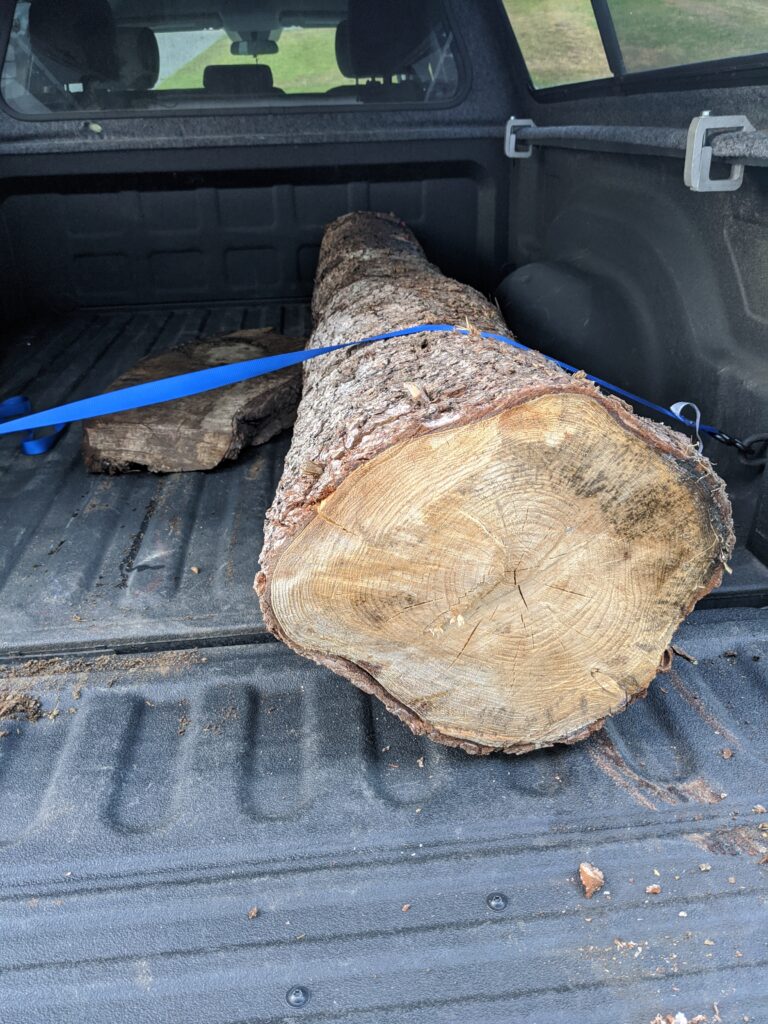
I recently purchased a Stihl MS 661 chainsaw and a Granberg 36″ Alaskan Chainsaw Mill. After finally receiving chains meant for ripping (this took a month and a half due to COVID delays), I got out in the yard this weekend to slab up a pine log I picked up from a neighbor.

The process I used for milling isn’t really unique. There are hundreds of videos on Youtube that show the same technique, but I thought it would be fun to write up my own experience.

I used an old aluminum extension ladder to guide the first cut. Putting screws through the rungs and into the log secured the ladder, giving me a flat level surface for my first cut.

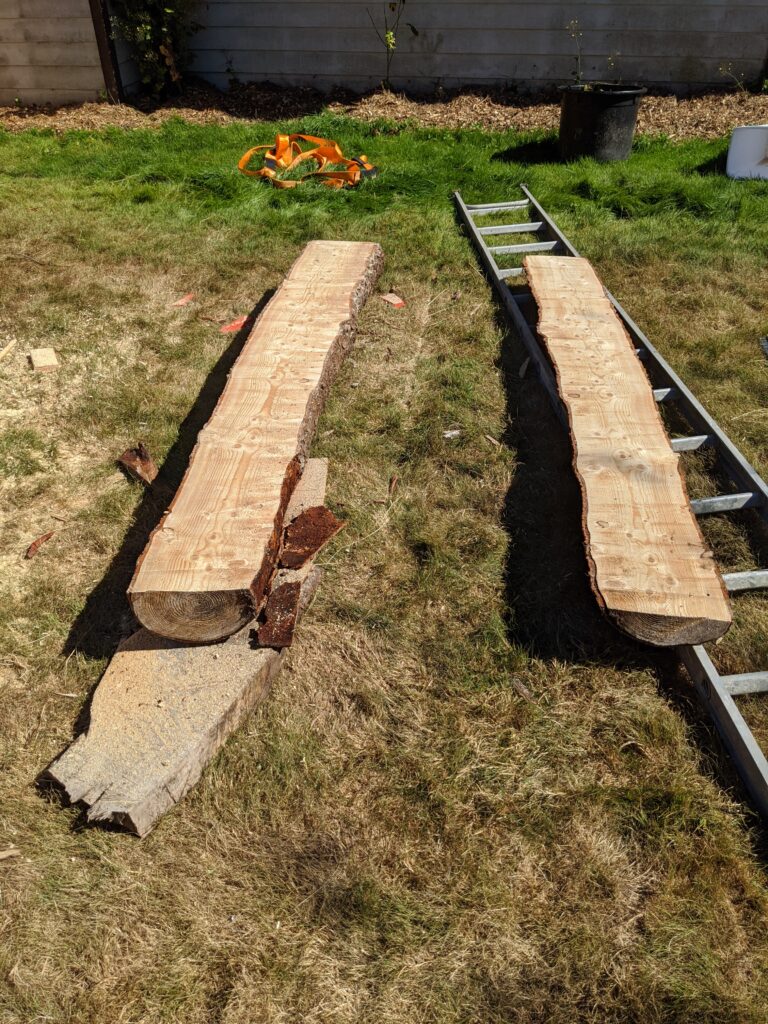
After finishing the first cut, I made the rest of the cuts using the flat top of the last cut to register the saw mill.

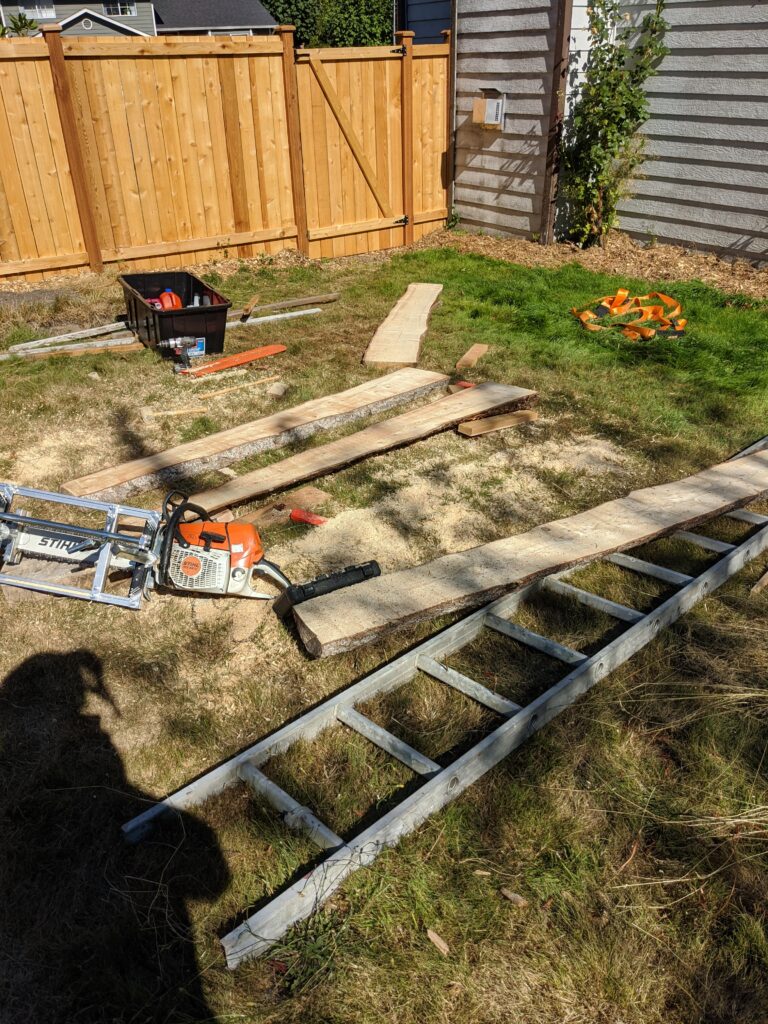
I got 2 slabs from the log, each 2 1/2″ thick. After that, I decided to get one more cut from the top of the log. I had set for a very thick cut to avoid hitting the screws with my saw, so I was able to get an additional 1 1/2″ slab from that top.

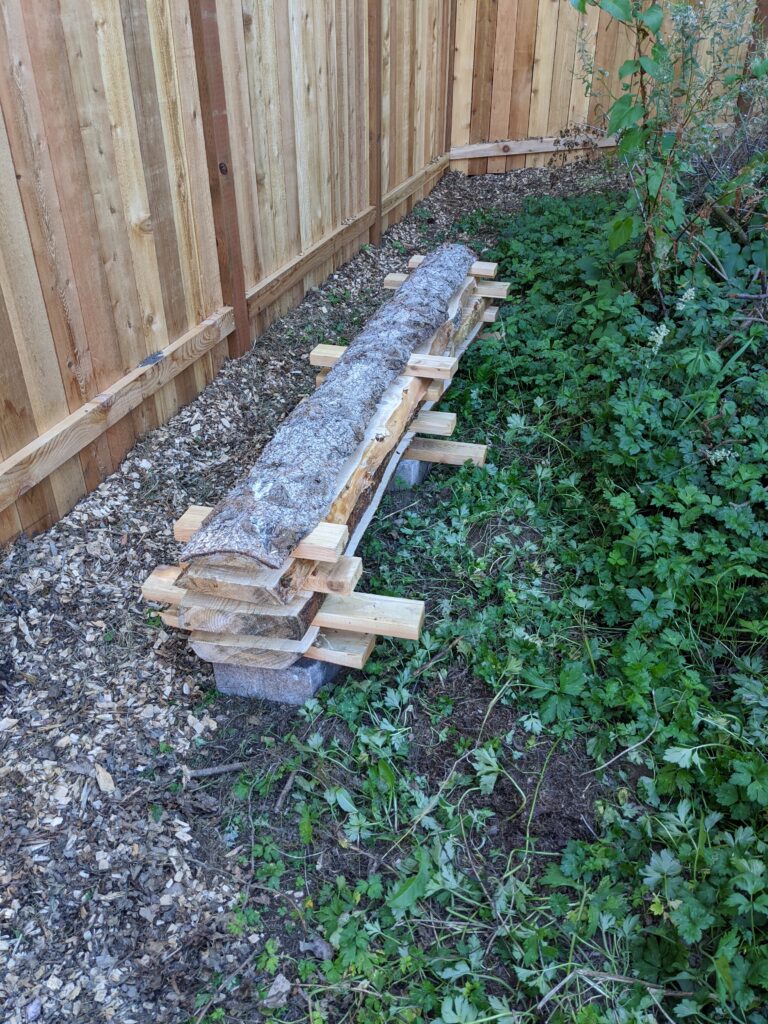
I stacked the slabs in a shady part of my yard. I had some short pieces of cedar (left-overs from our new fence) which I used as stickers, but I will eventually rip some smaller stickers and re-stack the logs.

I learned this technique for air drying lumber from Matt Cremona’s Youtube channel. Hopefully it works here in the Pacific Northwest. I guess I’ll find out in a year or so.

Slabbing the log only took a couple hours (include some novice mill setup). It was a bit exhausting, especially in 90º weather, but it was very satisfying to see the slabs coming off the log. I’m looking forward to cutting up more logs in the future!

Other Equipment

Here is some other equipment I used for milling.

Husqvarna Forest Helmet – Since I’m just milling on the ground, I don’t think the hard hat is important, but the integrated face screen and hearing protection make this a convenient choice.

Chainsaw Work Gloves – I picked these out on Amazon. They’re comfortable and flexible. I can’t speak to their effectiveness at stopping a saw (and hopefully never will), but they do a good job of protecting my hands from the heat of the saw head while milling.

Timber Savage 5.5″ Felling Wedges – I use these to keep the log from pinching the saw. I’ve also used them to help wedge under the log and keep it stable while milling. Any rubber mallet is also handy for knocking the wedges into place.

Forester Chainsaw Safety Chaps – Again, I hopefully won’t ever have to experience the safety effectiveness of these, but they’re a good safety precaution.

3M Reusable Respirator and filter – From what I’ve read online, these aren’t necessary, and I’m not even sure if they’re effective at eliminating fumes from the chainsaw. That said, they do reduce the strong exhaust smell while I’m cutting.

Categories
Jigs

Center Drilling Dowels

For a recent project, I needed to figure out a way to drill holes in the center of some wooden dowels. Because the dowels needed to be 20-30 inches in length, I wouldn’t be able to directly use my drill press to drill the holes. I initially figured I could get away with finding the center of the dowel and then eyeballing the angle to drill straight into the dowel. After spending far too much time trying to get this to work, I decided that eyeballing wouldn’t be accurate enough.

After some thought, I came up with a jig that would allow me to accurately drill a hole straight into the center of the dowel.

First, I glued two pieces of scrap 2×4 together to make a block approximately 3″ by 3.5″. The exact dimensions aren’t super important, but creating a thicker block helps with accuracy.


Next, make sure your drill press table is at a precise 90° angle to the chuck. If it’s not accurate your jig won’t be accurate, and then your dowel holes won’t be accurate.

Using a Forstner bit with the same diameter as your dowels, drill about halfway through your laminated block. It isn’t critical to drill exactly halfway through, but make sure you drill far enough that the dowel will be securely held perpendicular when it is placed into the hole.

Now swap out for the drill bit that you want to use for drilling into the dowel. Align the bit with the center divot that the Forstner bit left in the hole. Drill the rest of the way through the block.

Now you have two holes that should be centered and parallel with each other. The larger hole will hold your dowel in place while you drill. The smaller hole will guide your drill bit to ensure that it’s centered and parallel to the dowel.

To drill your dowel, secure your jig vertically in a vise, or with clamps. Insert your dowel into the larger hole. It might be a tight fit if your Forstner bit is the exact size of the dowel. If you have trouble getting it to fit, you can use sandpaper to slightly narrow the width of the dowel. Keep in mind that you’ll also need to get the dowel back out of the hole, so don’t force it into the hole if it’s too tight.

Once you’ve loaded up the dowel, you can drill through the guide hole on the other side of the jig. If you need a specific hole depth, put a piece of tape on your drill bit to tell you when you’ve reached the desired depth.

And there you go. Some scrap wood and 20 minutes of time will give you a jig that can drill accurate and repeatable holes.

Categories
Uncategorized

Hello world!

I’ve been enjoying my woodworking hobby and want a place to write about it. No particular aspirations or goals. I mostly want a place to track my projects, and a way to see my own improvements over time.